WordPress and camweara virtual try-on logos

Are you ready to elevate your e-commerce store with an engaging virtual try-on experience? Camweara’s API allows you to seamlessly integrate virtual try-on functionality into your WordPress/Woocommerce based website, providing your customers with an interactive way to explore and try on products virtually. 

In this comprehensive guide, we will walk you through the step-by-step process of integrating Camweara API into your WordPress site. Let’s get started! 

Step 1: Login/Signup to the CamWeara Dashboard

Sigining up to camweara dashboard

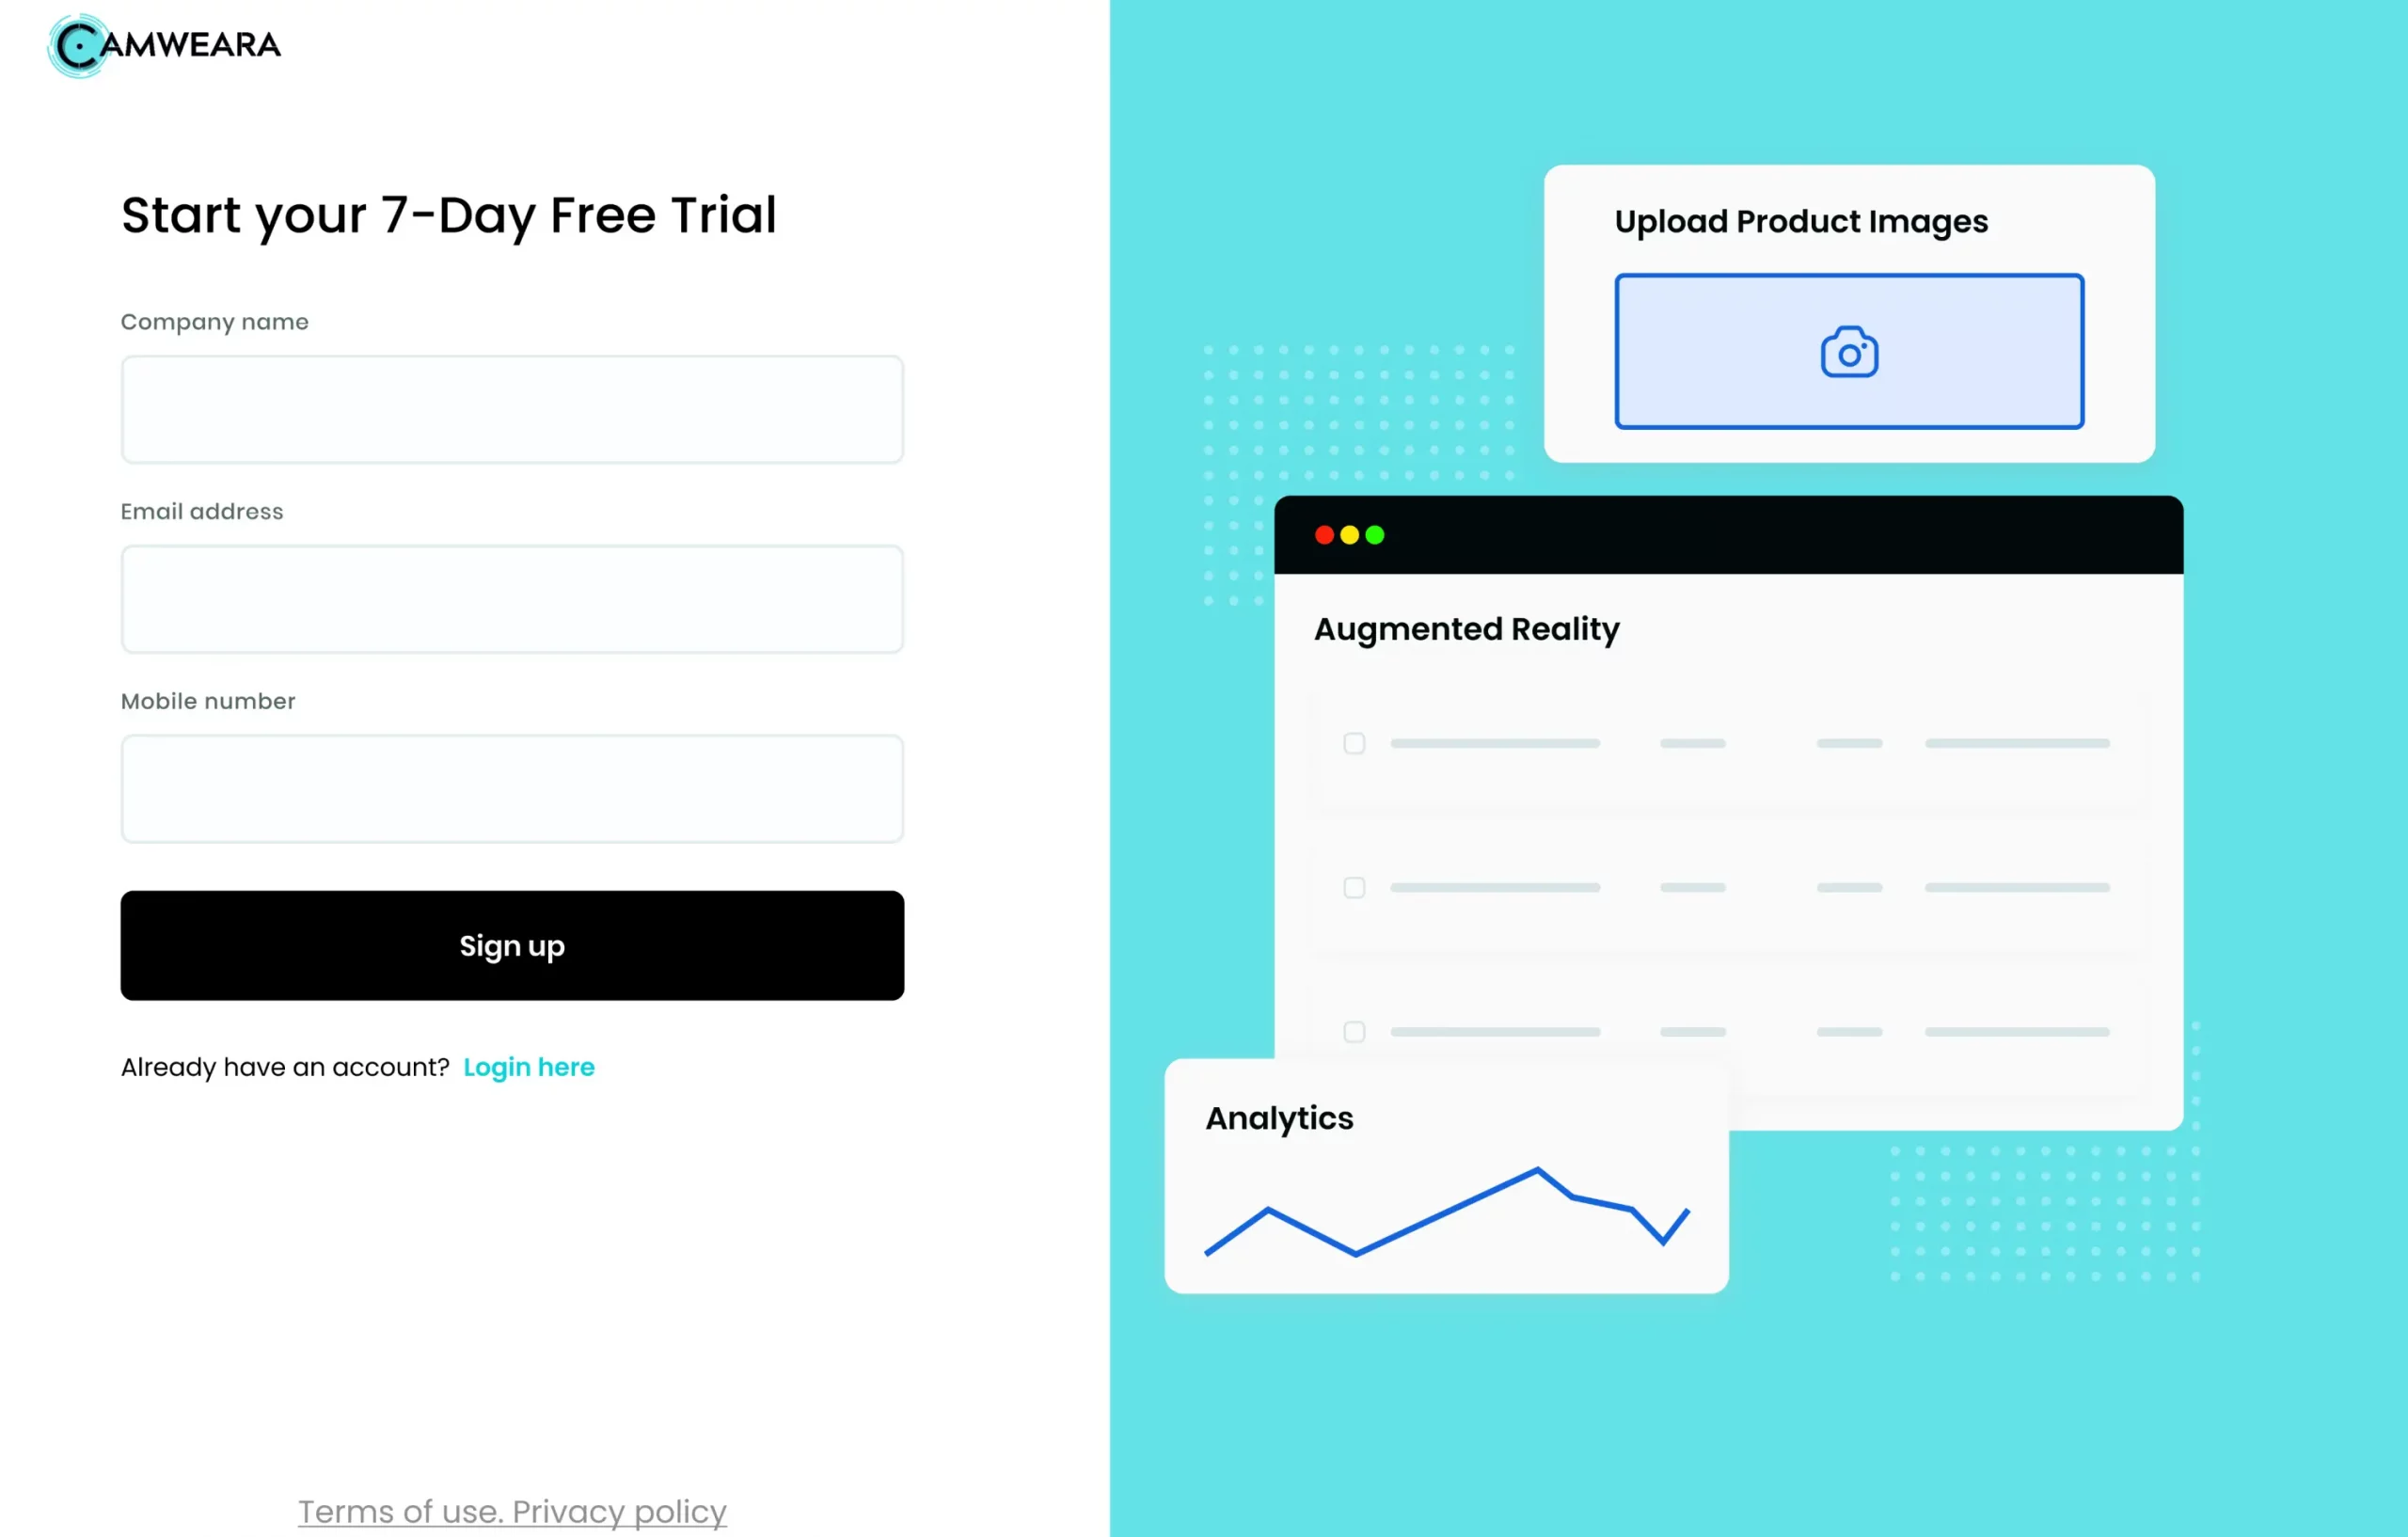
To begin the integration process, log in to your existing Camweara account or sign up for a new account on the Camweara website. Once logged in, you will gain access to the Camweara dashboard, where you can find all the necessary resources to set up the virtual try-on feature on your website.

Step 2: Go through the API documentation which is available on the website & Dashboard

Showing how to access API documentation form the dashboard

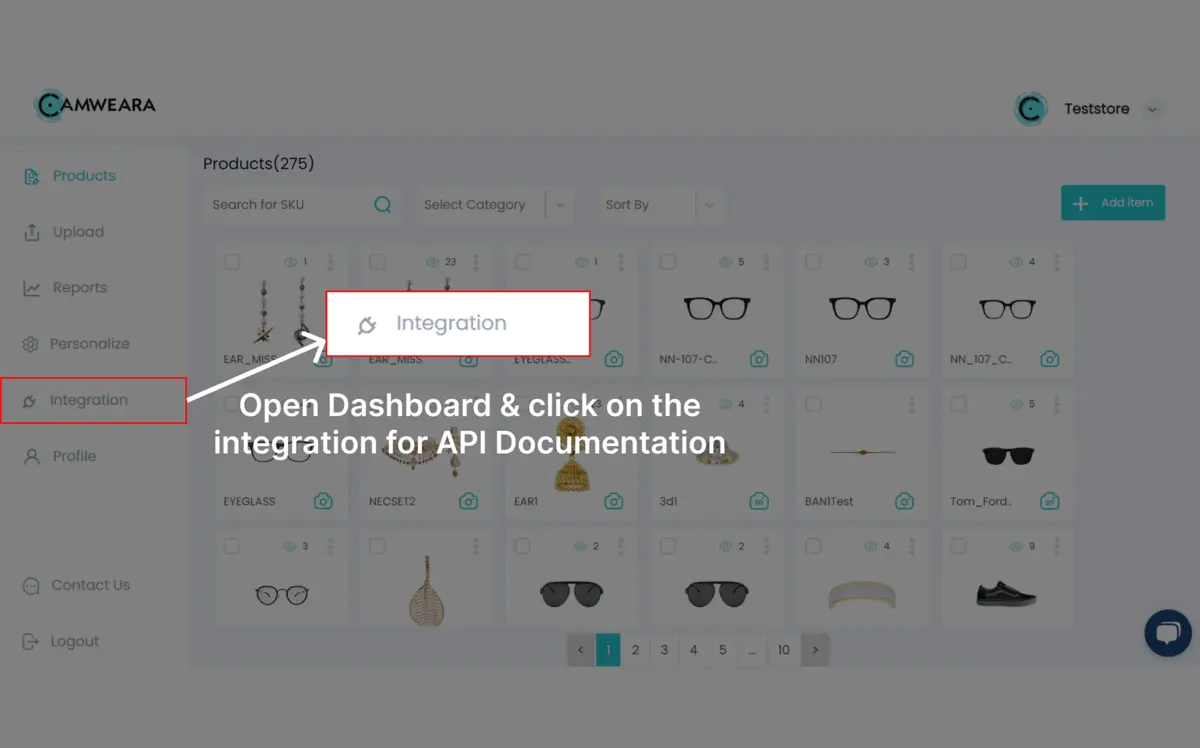
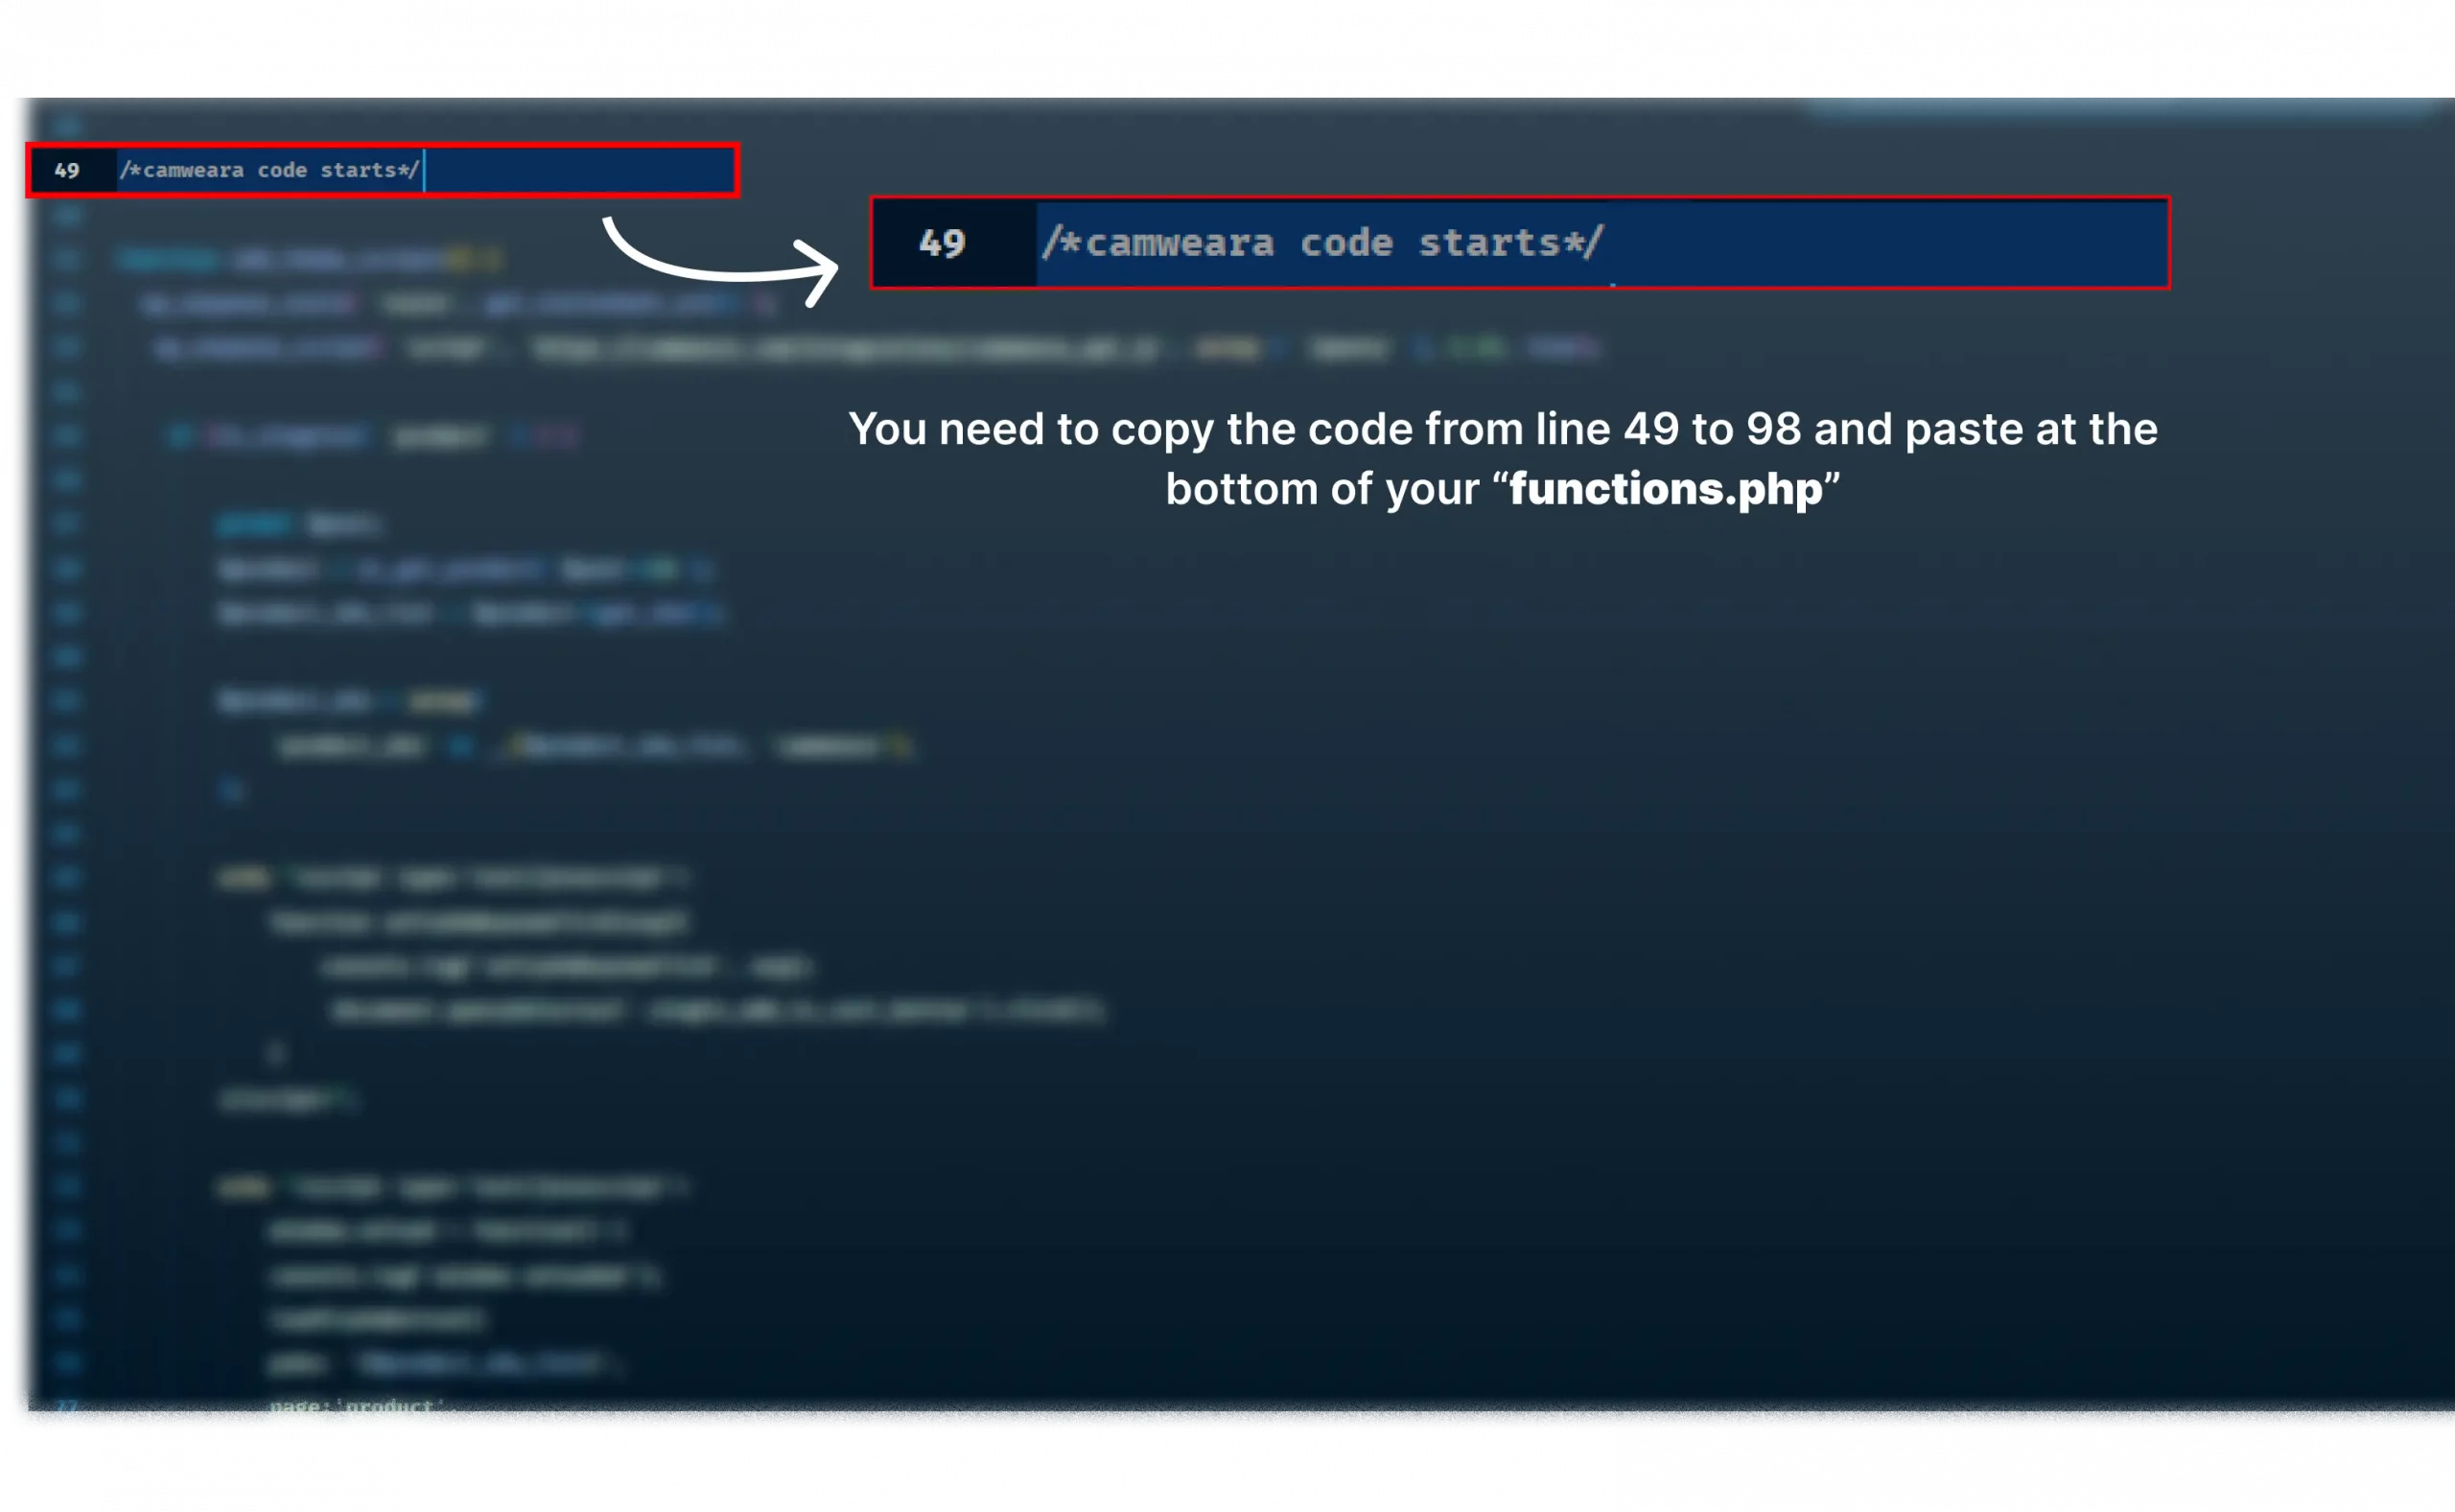
Within the Camweara dashboard, navigate to the API documentation section. Take your time to thoroughly review the provided documentation, guidelines, and code snippets. Familiarize yourself with the necessary steps and requirements to ensure a smooth integration process.

Step 3: Access the function.php in WordPress from Appearance->Theme File Editor->functions.php

Going throughwordpress options to fuctions.pnp file editor

Go to the WordPress admin panel and go to the “Appearance” tab. Select “Theme Editor” from the drop-down menu. The Theme Editor allows you to modify the theme files of your WordPress website.

Step 4: Download referral functions.php, copy code from line no. 49 to 98 and paste them to the bottom of your “functions.php”

Shouwing the line 49 and where to start from copying code
  • Click here to download the functions.php required for reference. Locate lines 49 to 98 & copy the code.
  • Navigate to the “functions.php” file in your WordPress Theme Editor. Scroll down to the bottom of the file and paste the copied code lines (lines 49 to 98) at the end of the “functions.php” file.

Step 5: Change the company name from line 78 in the code to the company name given during the sign up.

Showing the line 78 where they need to enter the name of the company insted of reference one

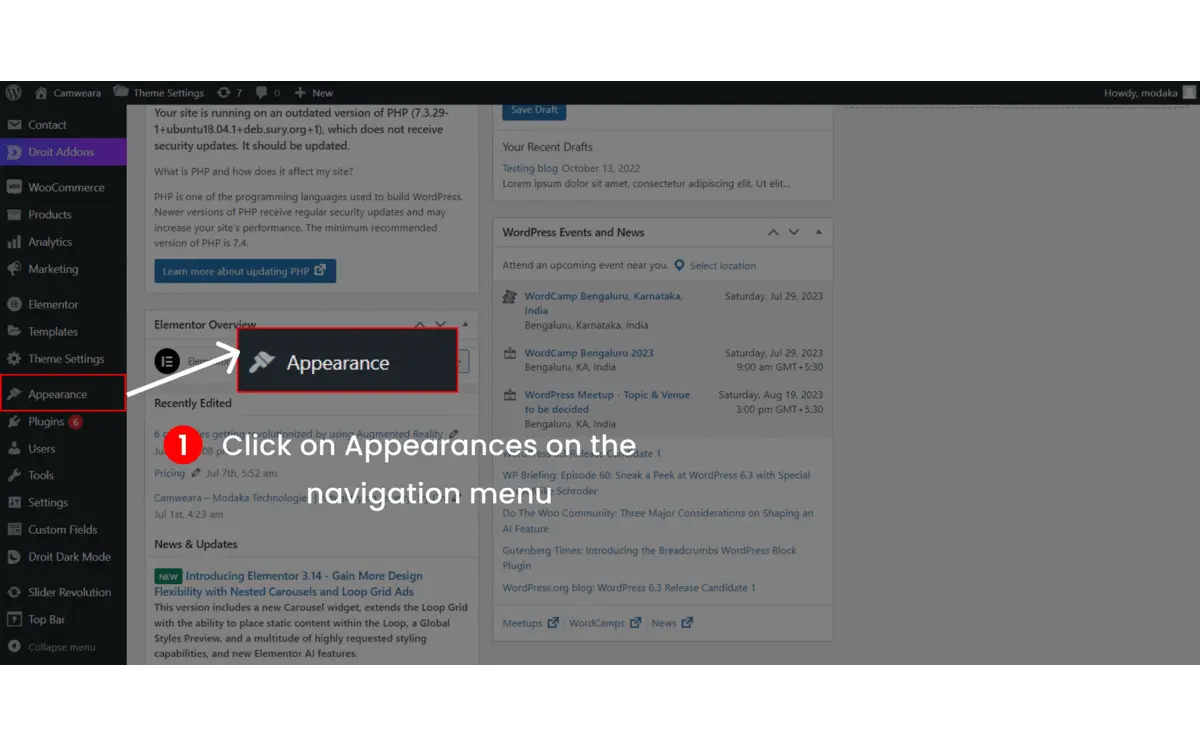
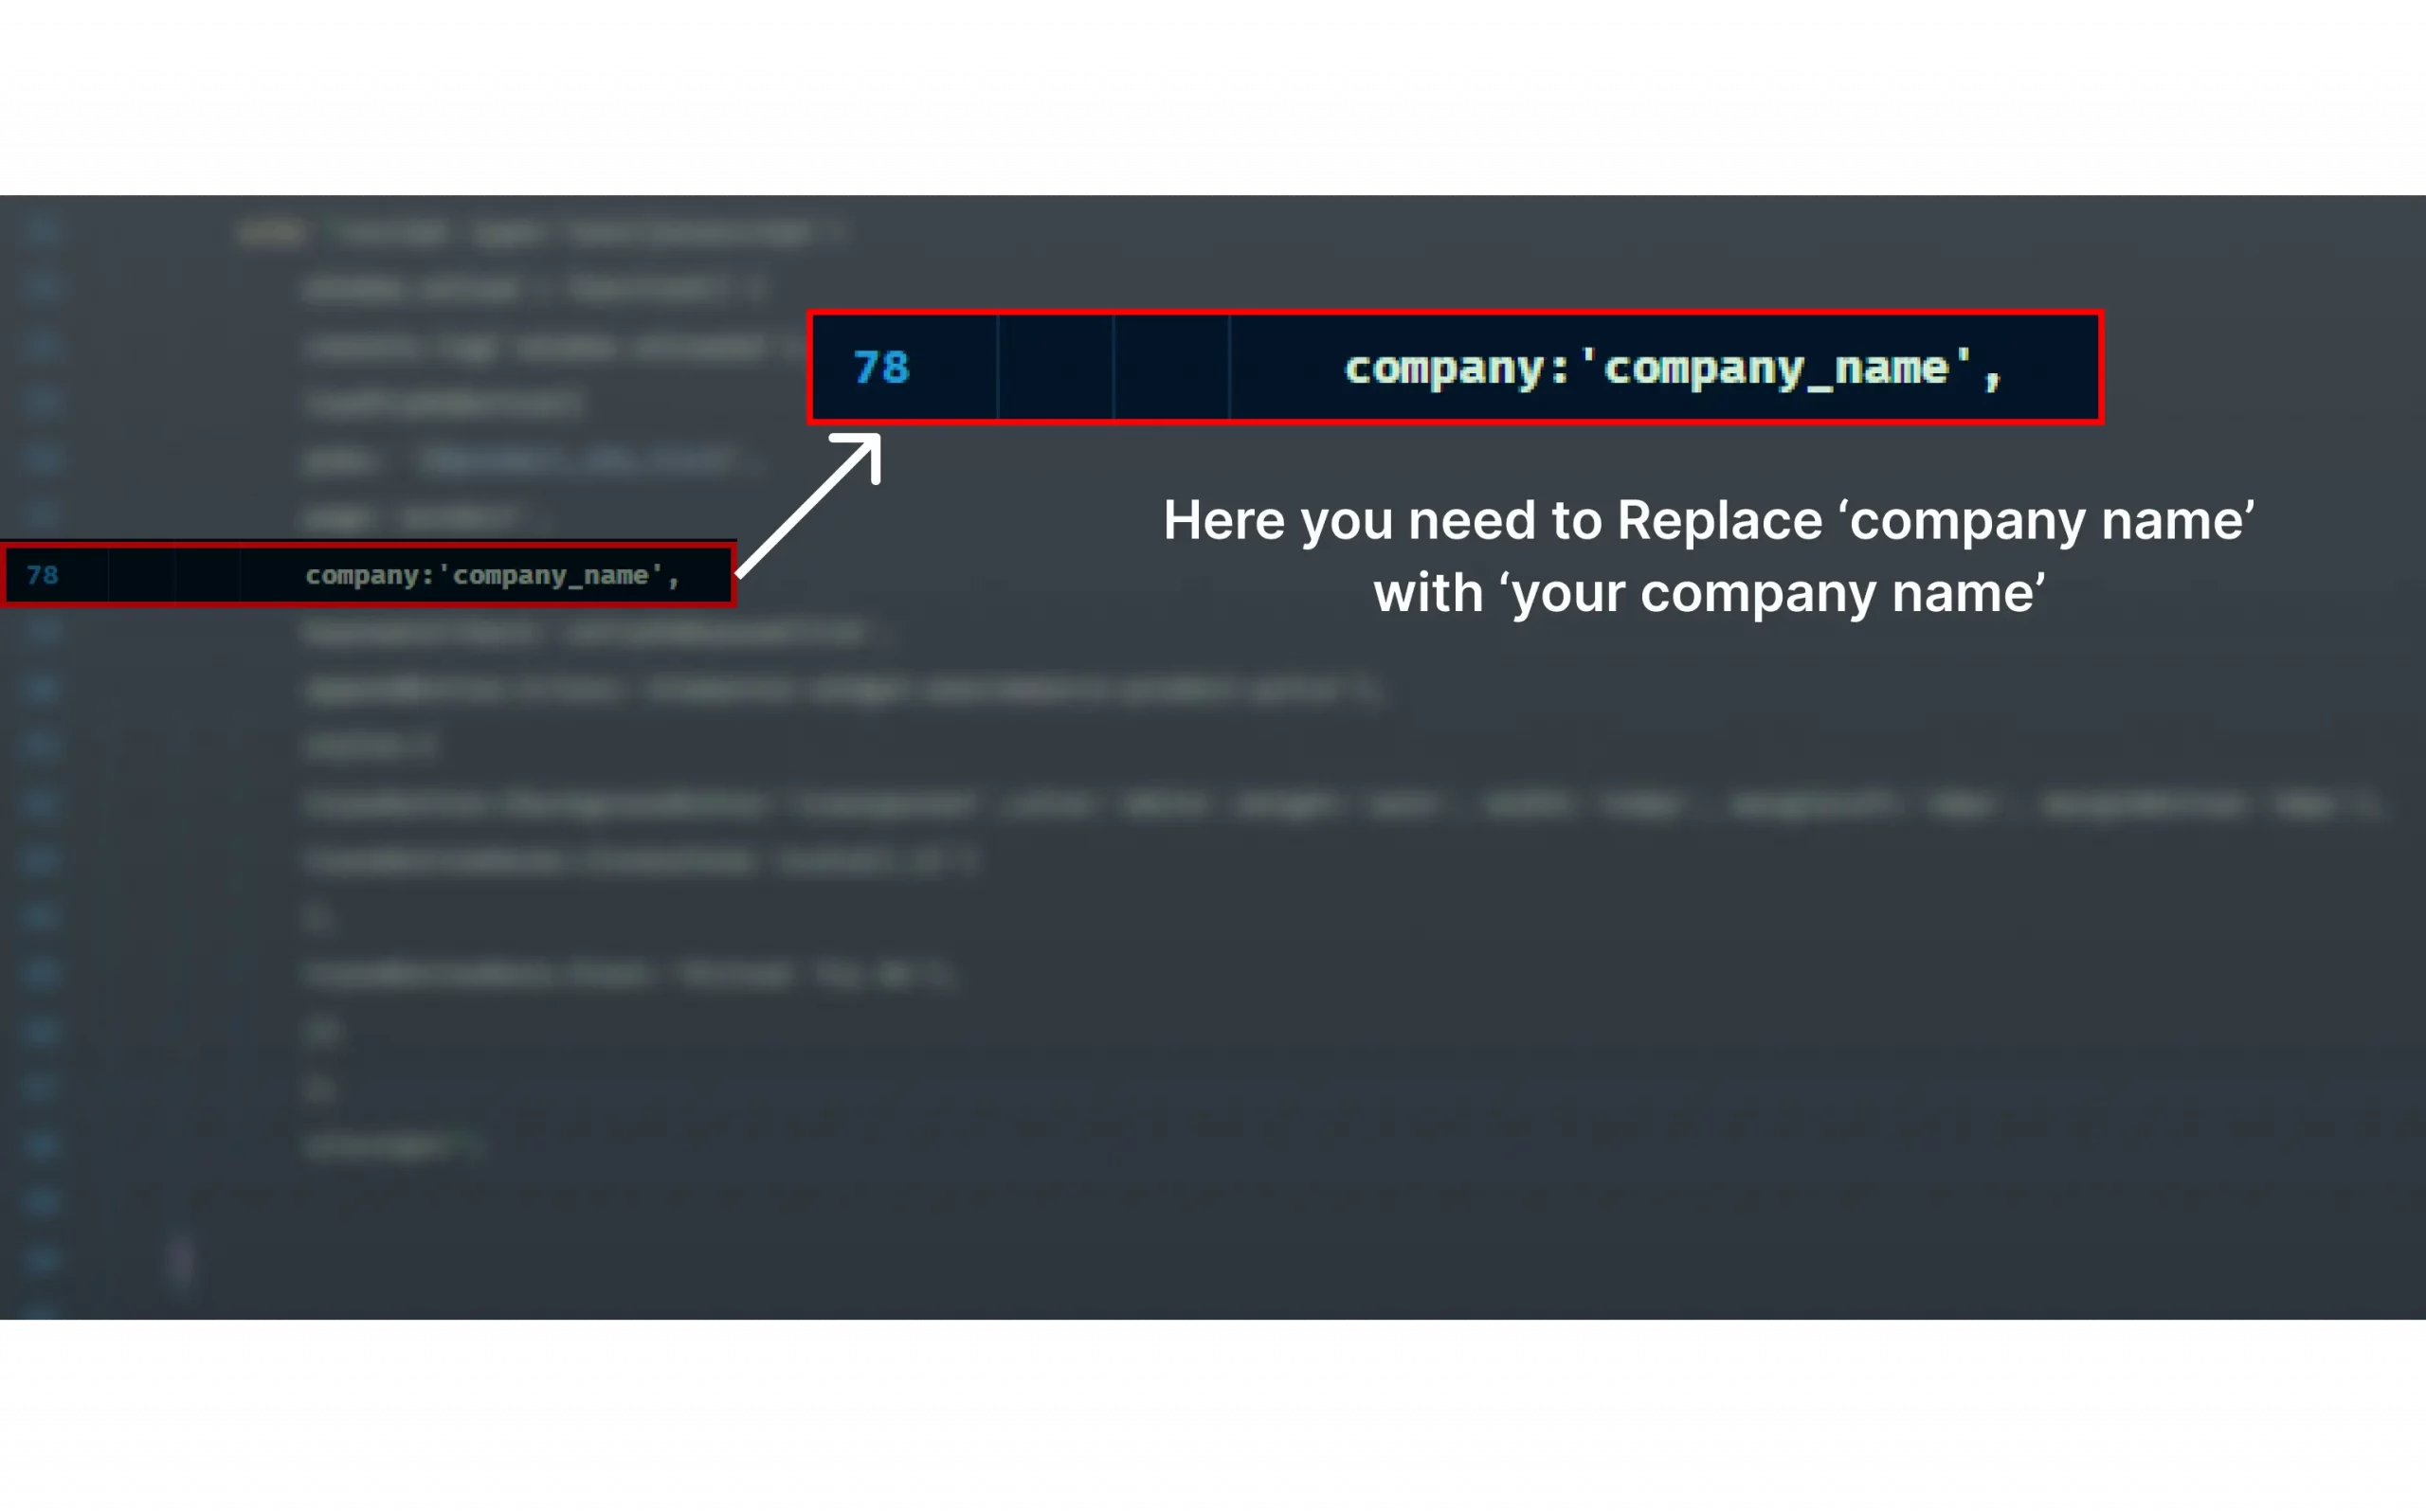
In the pasted code, locate line 78, which contains a placeholder for the company name. Replace this placeholder with the exact company name you provided during the signup process on the Camweara website. This customization ensures that the virtual try-on feature is tailored to your specific brand.

Step 6: Update the file changes and upload edited images on camweara dashboard.

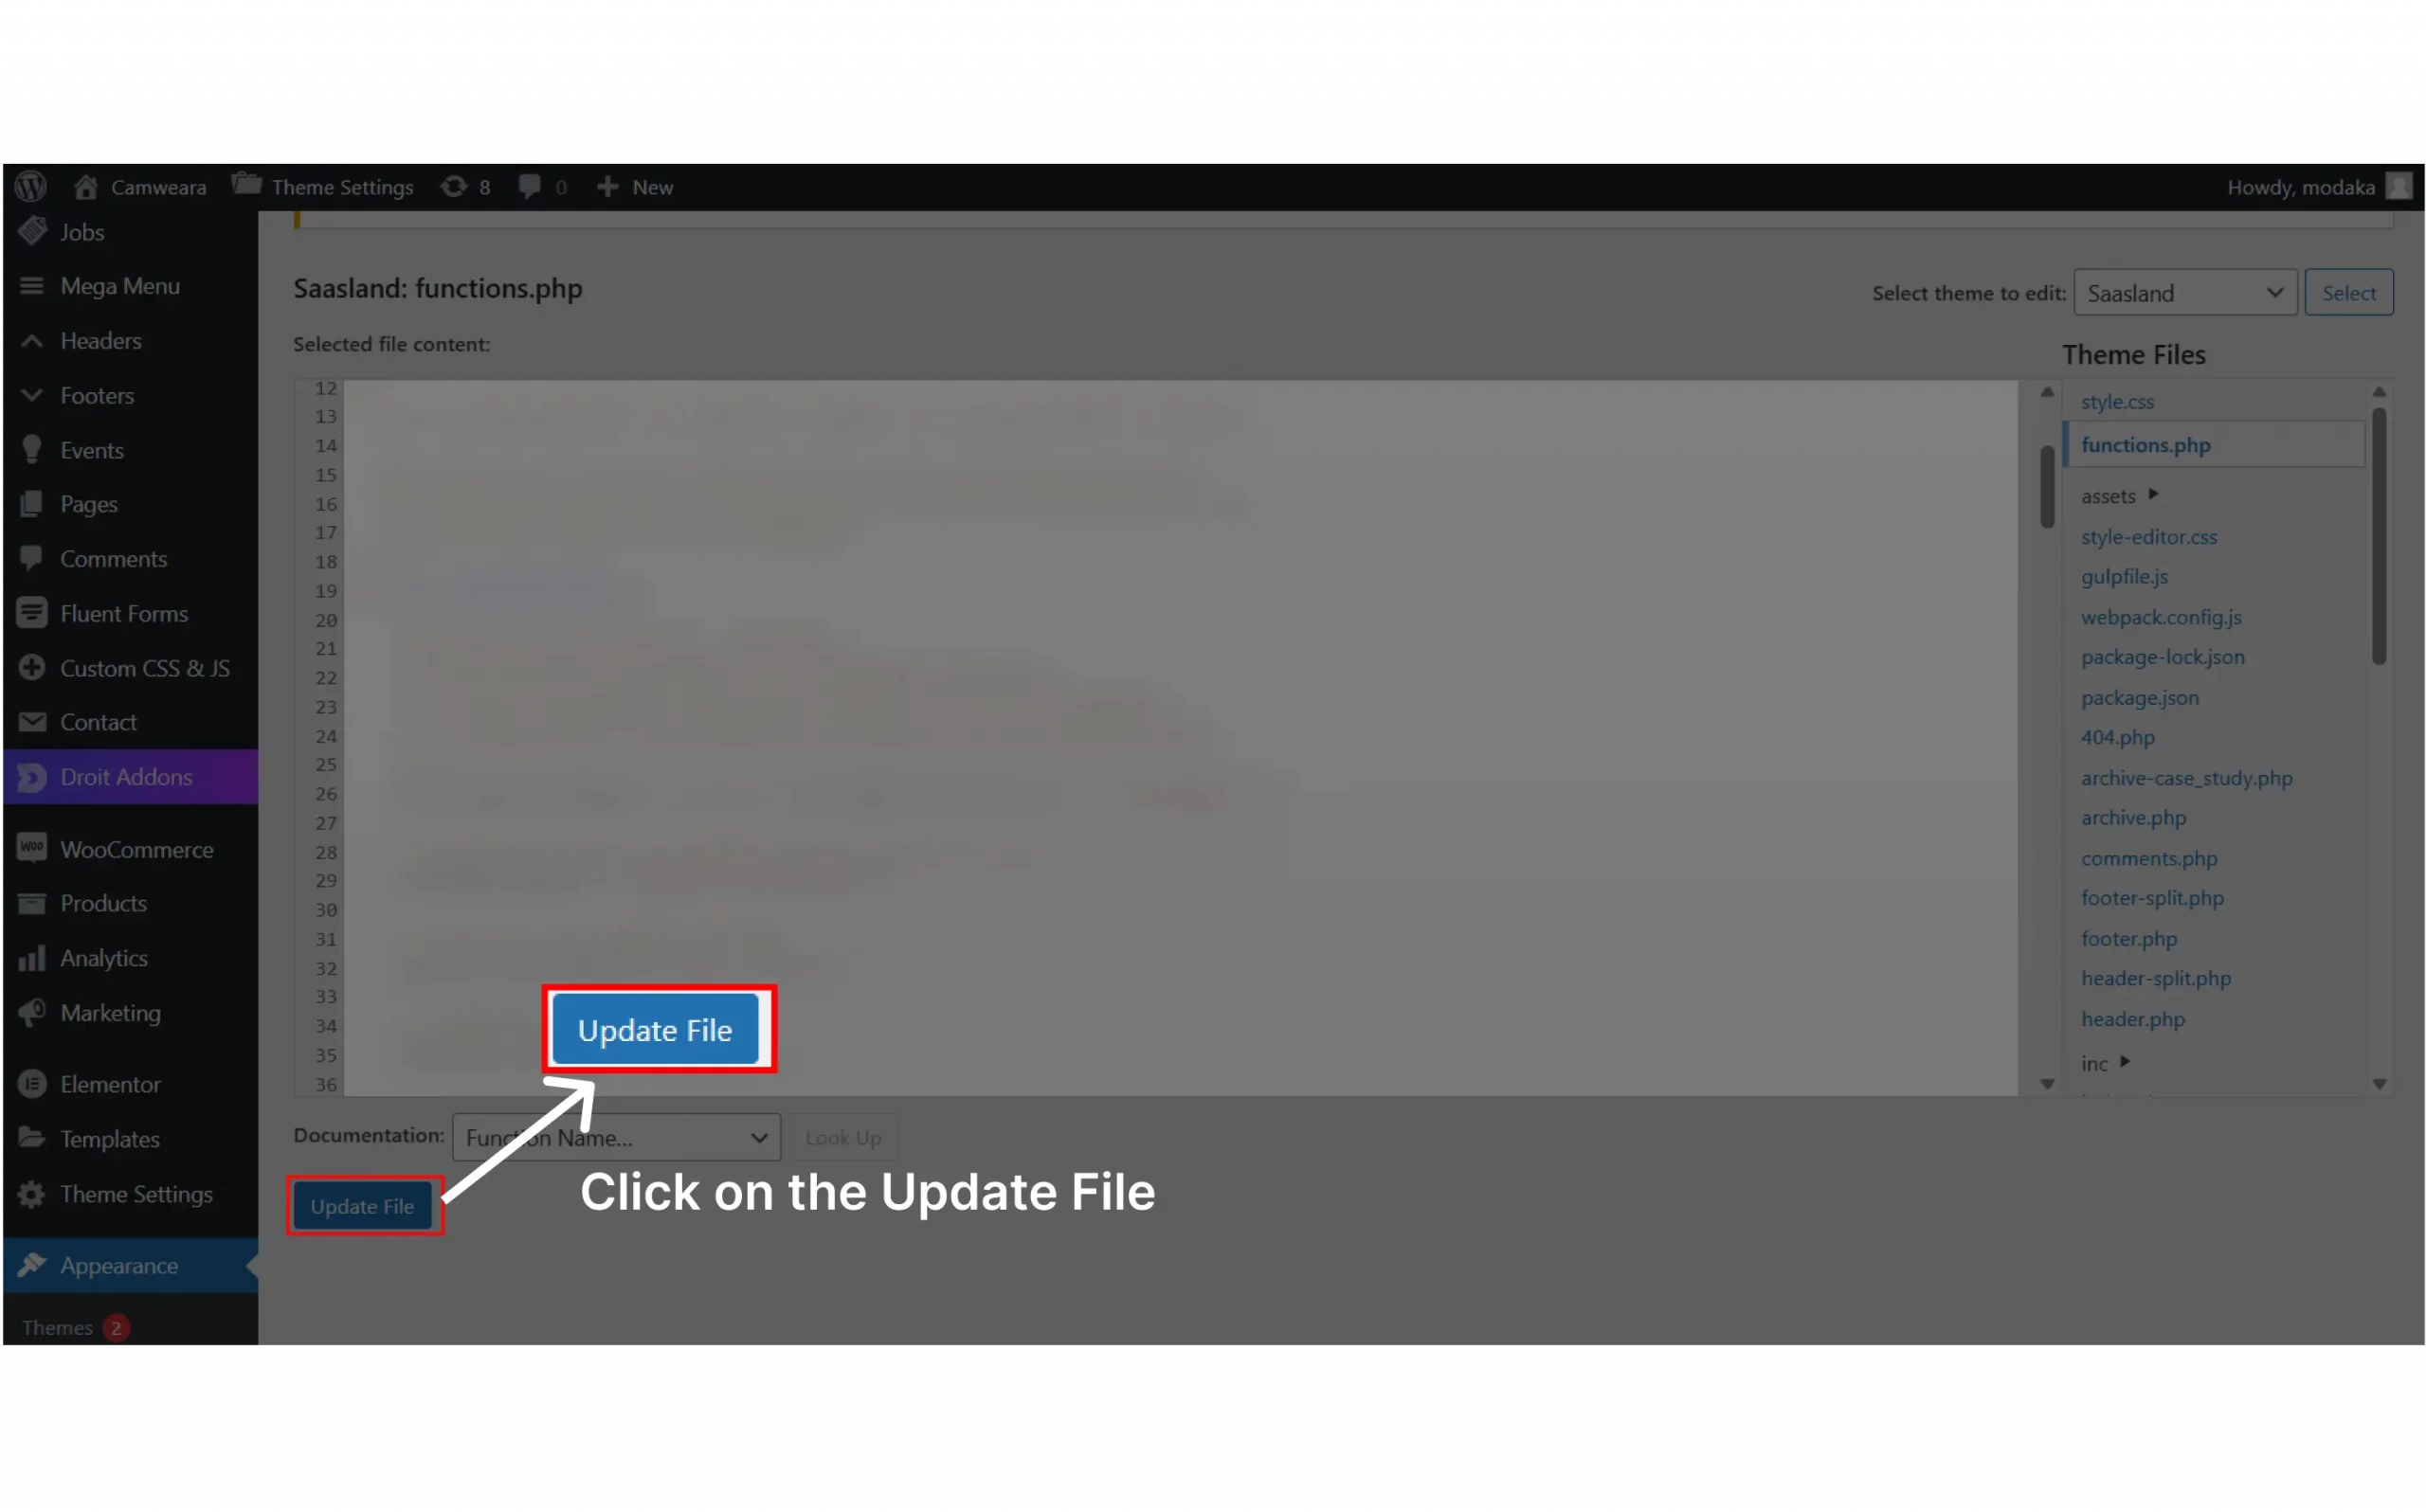
Once you have pasted the code and replaced the company name, save the changes by clicking the “Update File” button in the Theme Editor. You can now see try on button on products which are uploaded on Camweara dashboard.  If you are facing any issues, please feel free to reach out to us on info@modakatech.com.

Related Post

Camweara is an AR Virtual Try On software helping people to try jewelry, eyewear, hats & many other categories before purchase. Thereby, saving billions of dollars and billions of customers time!

virtual try on jewelry

About Us

Follow Us